Category Archives: Tutorial

Clara Bows Fascinator Workshop photographed by Rosie Parsons

The gorgeous Rosie Parsons popped up to see me earlier in the week with her camera! after a lovely catch up at Bocca Bar she came with me to a ‘Mad Hatter’ themed fascinator workshop I was hosting at Caffe Clifton and took some snaps to go in my beautiful millinery website Clara Bows that both she and her husband Lee created for me.

It was a really lovely relaxed evening and the ladies that attended made some really beautiful things, two even vowed to wear their creations into work the next day!  I so hope they did.  Anyway, as they say, a picture can tell a thousand words and as usual Rosie has done me so incredibly proud, I cherish these images and can’t wait for our ‘road trip’ in just over a weeks time!

Clara Bows Fascinator Workshops

Leave a comment

Filed under Alice In Wonderland, clara Bows, fascinator workshop, Rosie Parsons, Tutorial, Vintage Tea Sets

Introducing my 1920’s Millinery Website – Clara Bows

Its official launch isn’t until June this year but here’s a taster, I need to photograph all my hats and fascinators which is easier said that done at the minute (a good chunk are with a magazine which is another story!) so for now there’s some old pics on there .  Excuses excuses! check out my very flapperesque website Clara Bows Millinery (make sure you click on the gramophone!) created by the wonderful Rosie & Lee.  They’ve done an amazing job, thanks guys x

This website will be selling hats I make, giving details on how to order a bespoke hat from me and of course, details on my fascinator workshops (with lots of pictures showing them in progress).  I’ve been selling hats now for well over a year, no promotion at all but still getting at least a couple of orders a month usually people who stumble on me via the web or who stop me in the street.  I’ve been given my own millinery section in the Bristol Fashion Show later in the year.  I’m excited, nervous and honoured all at once about that, I’m busily making my six key pieces……six pieces that I’ve wanted to make for years heavily influenced by the 1920’s, its a creative indulgence and I’ve had to up my skills to create these pieces where the practices needed to make them have almost died out.  And two of these pieces wouldn’t be possible If it wasn’t for a lady with over 50 years in the business making hats for Royalty  passing on her skills as I couldn’t find anyone else up to the job.  All the feedback I’ve had from customers has been incredible but whilst I was growing Vintage Tea Sets I kept this in the background, and lets face it I’m very very busy with the china hire business!  But with the support of my lovely Mum – together we make an amazing team – she blocks the hats for me, makes those lovely vinyl cakes stands that just keep flying off the shelves and helping get big orders together.

1 Comment

Filed under 1920's, clara Bows, Cloche Hat, fascinator workshop, Flapper, Tutorial, Wedding Fayre

Fascinator and Jewellery Workshops perfect for hen parties from Vintage Tea Sets

Button Jewellery brought to you by Alex Costa

I announced in a previous post recently that I’m running a number of fascinator workshops in 2010, the response to these has been fantastic and bookings for Easter and the Summer are coming in thick and fast. I also wanted to let you know that I’m collaborating with a number of individuals on these courses, so if you fancied making a day of it I can offer a fascinator and jewellery package!  There’s even floristry package (learn how to hand tie bouquets or make some really personal button holes), hell there’s even a chocolatiers course as well!!! we’re able to hit the road and even offer cream teas on my gorgeous vintage china, whether you want to drink tea or champers out of the tea cups its entirely up to you! It’ll be a day to remember and best of all you get to keep what you make which is up to two fascinators from me and then for example a necklace and earring set. Over the next couple of weeks I’ll be introducing you to my workshop buddies.  We can come to you or arrange a workshop space near you alternatively email us for a list of our Bristol and South West venues.

First up, I’d like you to meet Alex Costa, a gal with some very classy makes, her forte is jewellery but she is a talented vixen with many more makes I’ll be blogging about in due course.  That’s one of her gorgeous button jewellery makes shown at the top of this post.  She’s been selling in boutique shops for over a year now and is based in central London.

Email me for more details on info@vintageteasets.co.uk or phone 0117 9532973

1 Comment

Filed under fascinator workshop, Tutorial, Vintage Tea Sets

How to make a cake stand using vintage plates and cups

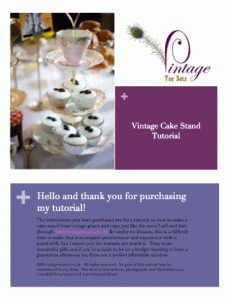
Happy New Year!!!  And on that joyous note here’s some good news.  I’ve written a downloadable tutorial including step by step pictorial instructions showing you how to make your very own cake stands made from vintage plates and tea cups, just like the ones I sell and hire through vintage tea sets.  I’ve had so many people email asking how I made them and I decided to put this tutorial together, I’ll be adding more during 2010.   Its downloadable as a PDF for only £5.00 and I show you exactly how I make my cake stands.  This is perfect for a crafty bride to be on a budget wanting a swish afternoon tea or anyone just feeling creative wanting to make something really unique and a little quirky.

Vintage Tea Sets cake stand tutorial

3 Comments

Filed under Tutorial, Vintage China Hire

How to make a tea cup candle, step by step instructions…..from Vintage Tea Sets

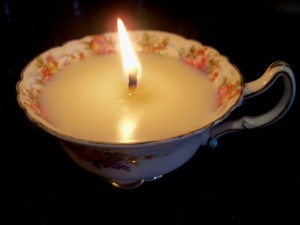
I reveal how to make one of these.......

I promise you, as soon as you’ve made one of these beautiful soy tea cup candles you won’t ever buy one as they are just too easy to make (within 5 mins you’ll have it poured and cooling), your house will turn into a mini production unit guaranteed.  I’ve been making these for over a year and a half now and my house is full of them, I’ve sold them very successfully in craft fairs and online as they make such a fabulous presents (think Mothers Day, Birthdays and Christmas) and they also make wonderful additions to table centre pieces or dotted around a venue to add some ambience for a vintage tea party or mad hatter tea party .  I use soy wax because its eco-friendly, water soluble and burns at lower temperatures so as not to damage the vintage china.  You can purchase or hire these through my vintage china hire website vintage tea sets but they are so fun to make, give them a go!

You do need to buy a few things, not much.  I’ve put together a shopping list for you but for a sound investment of £20 you can have enough tea cup candles for plenty of presents and also fill your house/event with them.  They go a long way and burn for over 32 hours.  Websites are charging between £12-20 per tea cup candle, you can make many many more for that, you just need to go to some car boot sales and charity shops and buy some tea cups.

Here are my step by step instructions.
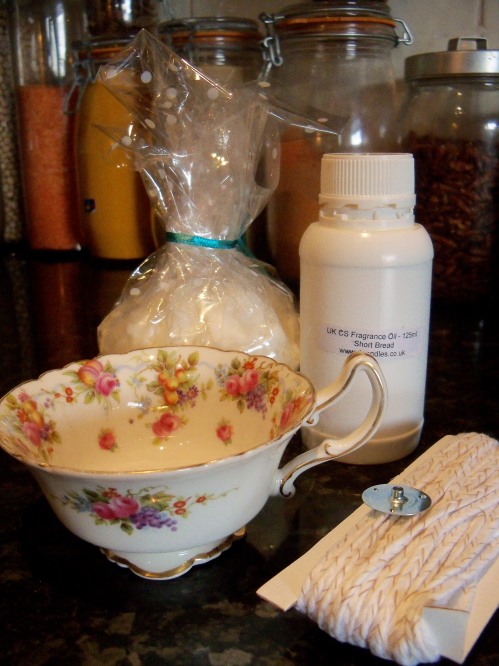
What you need

What you need:-  All the waxes, wicks and scent items are available from this website 4candles

Eco Soya Wax

Wedo Eco Wick

Metal tab for the wick

Scent (optional)

2 wooden skewers and some gaffa tape (I love gaffa!)

Scissors

2 saucepans, one small and one large and flat (Make a bain-marie)

Vintage Tea Cup

Step 1 – First you measure the wax out.  The wax comes in flakes and I fill the volume of my vintage cup up with flakes one and a half times.
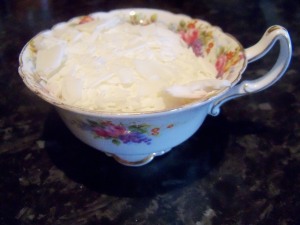
Measure the wax flakes

2 – Add to the small saucepan (don’t worry eco wax is water soluble and washes out with some washing up liquid).  Place the small pan in the larger pan filled halfway with water and over a medium to low heat gently melt the wax.

Melt the wax in a bain-marie
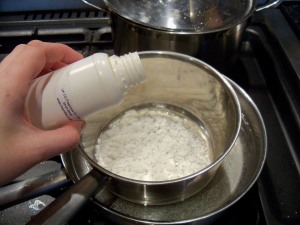
Add a scent if you like

3. Prepare your teacup.  Cut a length of wick and pull it through the metal tab (all for sale on the website I gave you earlier).  You can buy special metal pins to hold the wicks in place so it remains centered.  Being a resourceful so and so though I just used some wooden skewers and taped them closely together as seen below and that works just fine.  Now all you need do is pour the wax.

Now all you need do is pour the wax

4.  Now pour gently…….
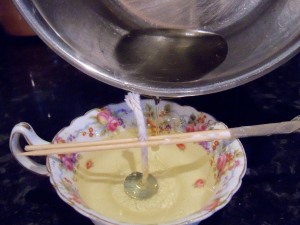
And pour......

5.  Over half an hour the wax will harden, do not move your tea cup candle during this stage.
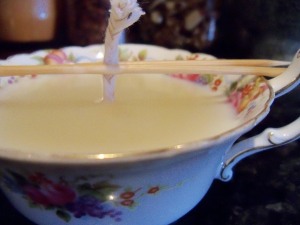
Slowly the wax will harden

6.  Finally, trim the wick and light!!!!

And light! How easy was that!!!!

I hope you enjoyed that little tutorial. More to come…….

52 Comments

Filed under Tutorial, Vintage China Hire